With the top well underway, my energy is diverted to the legs.
The choice of joinery in this case is through tennons, and wedges formed from our secondary wood - rosewood.
As there are curves involved there are a few tricks. My tools of choice for this task is my trusty makita drill with a 1/2" bit, and to keep me on the straight and narrow, a stanley no. 59 dowel jig.
Before getting started, you need mark out the mortise. So that I don't blow out the bottom I've actually removed 1/8-1/4" material on the underside - remember this is curved side will be visible (to thier feet anyway.)
This a twist or brad point bit aim to overlap your holes but drill every second one before the overlap. This technique allows symetrical forces on the bit and helps reduce the change of the bit skipping into the hole next to it.
I then clean the joint with hand tools. Bench chisels remove the bulk of the material but chopping, then paring. Then finally I use a rasp to smooth the inside careful not to roll or damage the edges.
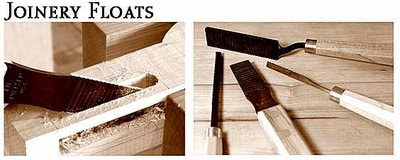
(A side note. I was at the Lie-Nielson site the other day and saw these joinery floats. I know little about them, but assume they work very similar to a rasp, and could be very handy at times. Let me know if you have any experience with them.)


.png)
A Retired Master Woodworker Reveals His Secret
ReplyDeleteAnnouncing The World's Largest Collection Of
16,000 Woodworking Plans
Detailed Step By Step Complete Plan Without Guesswork
From bill of materials, cutting lists, photos, 3D diagrams, etc
https://linktr.ee/16000woodworkingplansebook